Getting Started: 5 Fundamentals
CineSend is a powerful platform that allows you to store, manage, and deliver all kinds of professional media files. If you're new to CineSend, here are some basics you need to know to successfully get started:
- Creating Projects
- Uploading Files
- Sharing Secure Screeners
- Sending Files (for others to download)
- Creating and Sharing Screener Rooms
1. Creating Projects
Projects in CineSend are kind of like "containers" for your files. In most cases, projects should be used to hold everything related to a film project. Each title in your library should be contained within its own project. Create a new project by clicking the red "New" button on the main page:

As you add projects, they will appear on the main projects page as posters in a grid. You can customize the appearance of the poster by uploading your own image here:

Things to keep in mind or explore further:
- Projects can be sorted into groups.
- With CineSend Team plans, you can control what projects users can see.
- On paid plans, you can create file requests for others to upload directly into your projects without requiring an account.
2. Uploading Files
Once you've created a project, click on the poster to enter it. To upload a file, click on the red "New" button, and select one of the "Upload file" options:
- Upload file will allow you to select a file from your computer, and upload it using your web browser.
- Upload file with Aspera Connect (available on paid plans) will prompt you to install and launch a small program called IBM Aspera Connect. This program runs in the background of your computer and offers faster upload speeds and auto-resume functionality in the case of a transfer failure or internet cut-out.
If you're uploading a Digital Cinema Package (DCP), be sure to use the "Upload DCP" option, which will allow you to select the entire DCP folder, and upload it all at once.

3. Sharing Secure Screeners
Secure screeners allow you to share a video with someone outside of your CineSend account as a non-downloadable streaming link. Videos are DRM protected, so they can't be captured with browser plugins, and you can optionally watermark each link uniquely for each recipient. To send a secure screener, navigate to the "Screeners" tab located within the project, click on the video asset.
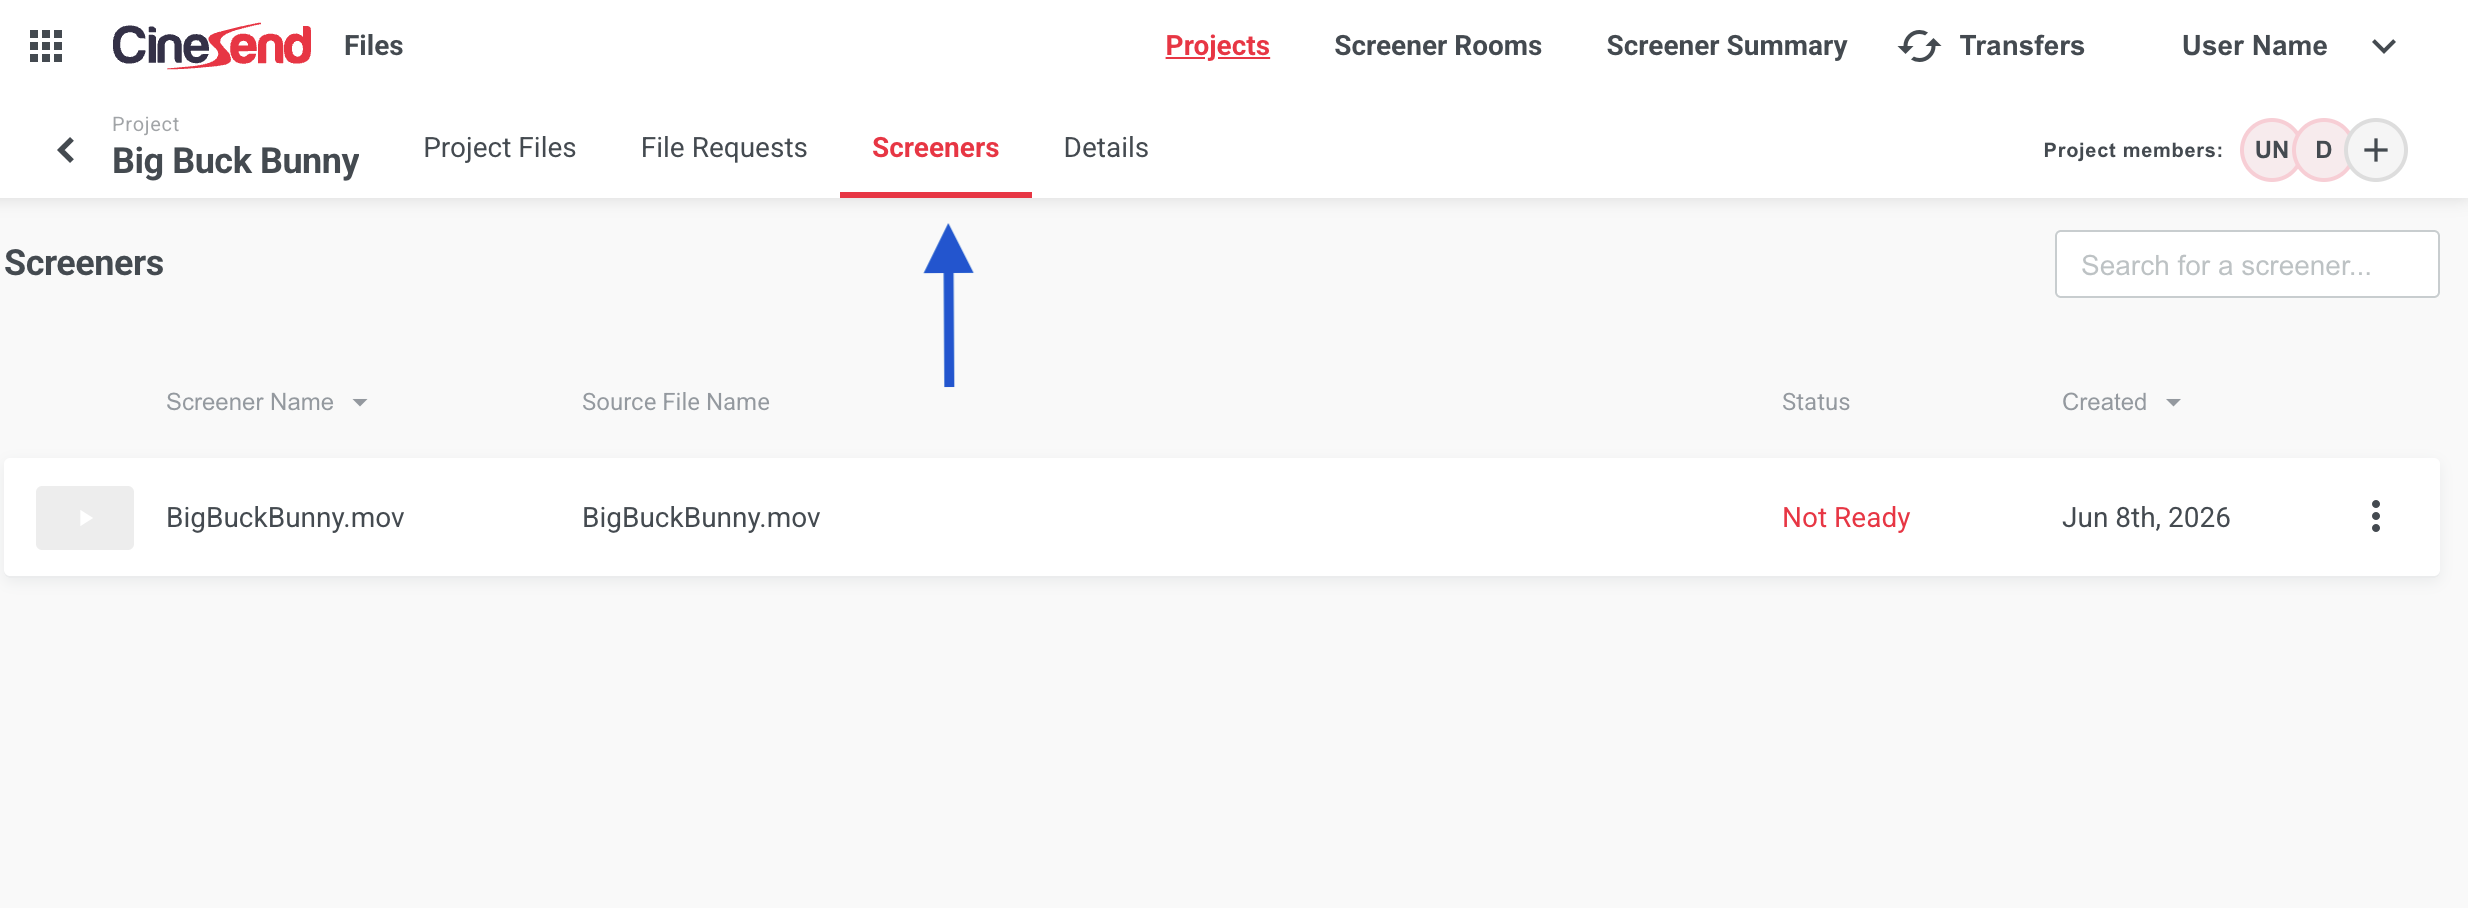
The first time you select this option, you will be prompted to encode the HD screener, which may take a little while.
Once it's done, you can start sharing the screener by e-mail, or by creating shareable links:

As recipients start watching your screener, you'll be able to monitor how much they watched, and what sections they may have skipped in what we call a "heatmap". The heatmap is a timeline - the darker a section gets, the more it has been viewed.

4. Sending Files (for others to download)
If you'd like to share a file with someone outside of your CineSend account, select the option button on the file you wish to share, and select one of the two options:
- Share file will allow the recipient to download the file through the web browser, similar to other file sharing sites.
- Share file with with Aspera Connect (available on all plans for an added per gigabyte fee) will prompt the recipient to install and launch a small program called IBM Aspera Connect. This program runs in the background of their computer, and offers faster download speeds and other features like auto-resume in the case of a transfer failure or internet dropout. This option is strongly recommended for sharing DCPs, because Aspera will download the entire DCP folder with the correct file structure.

You can also share multiple files or folders at the same time:

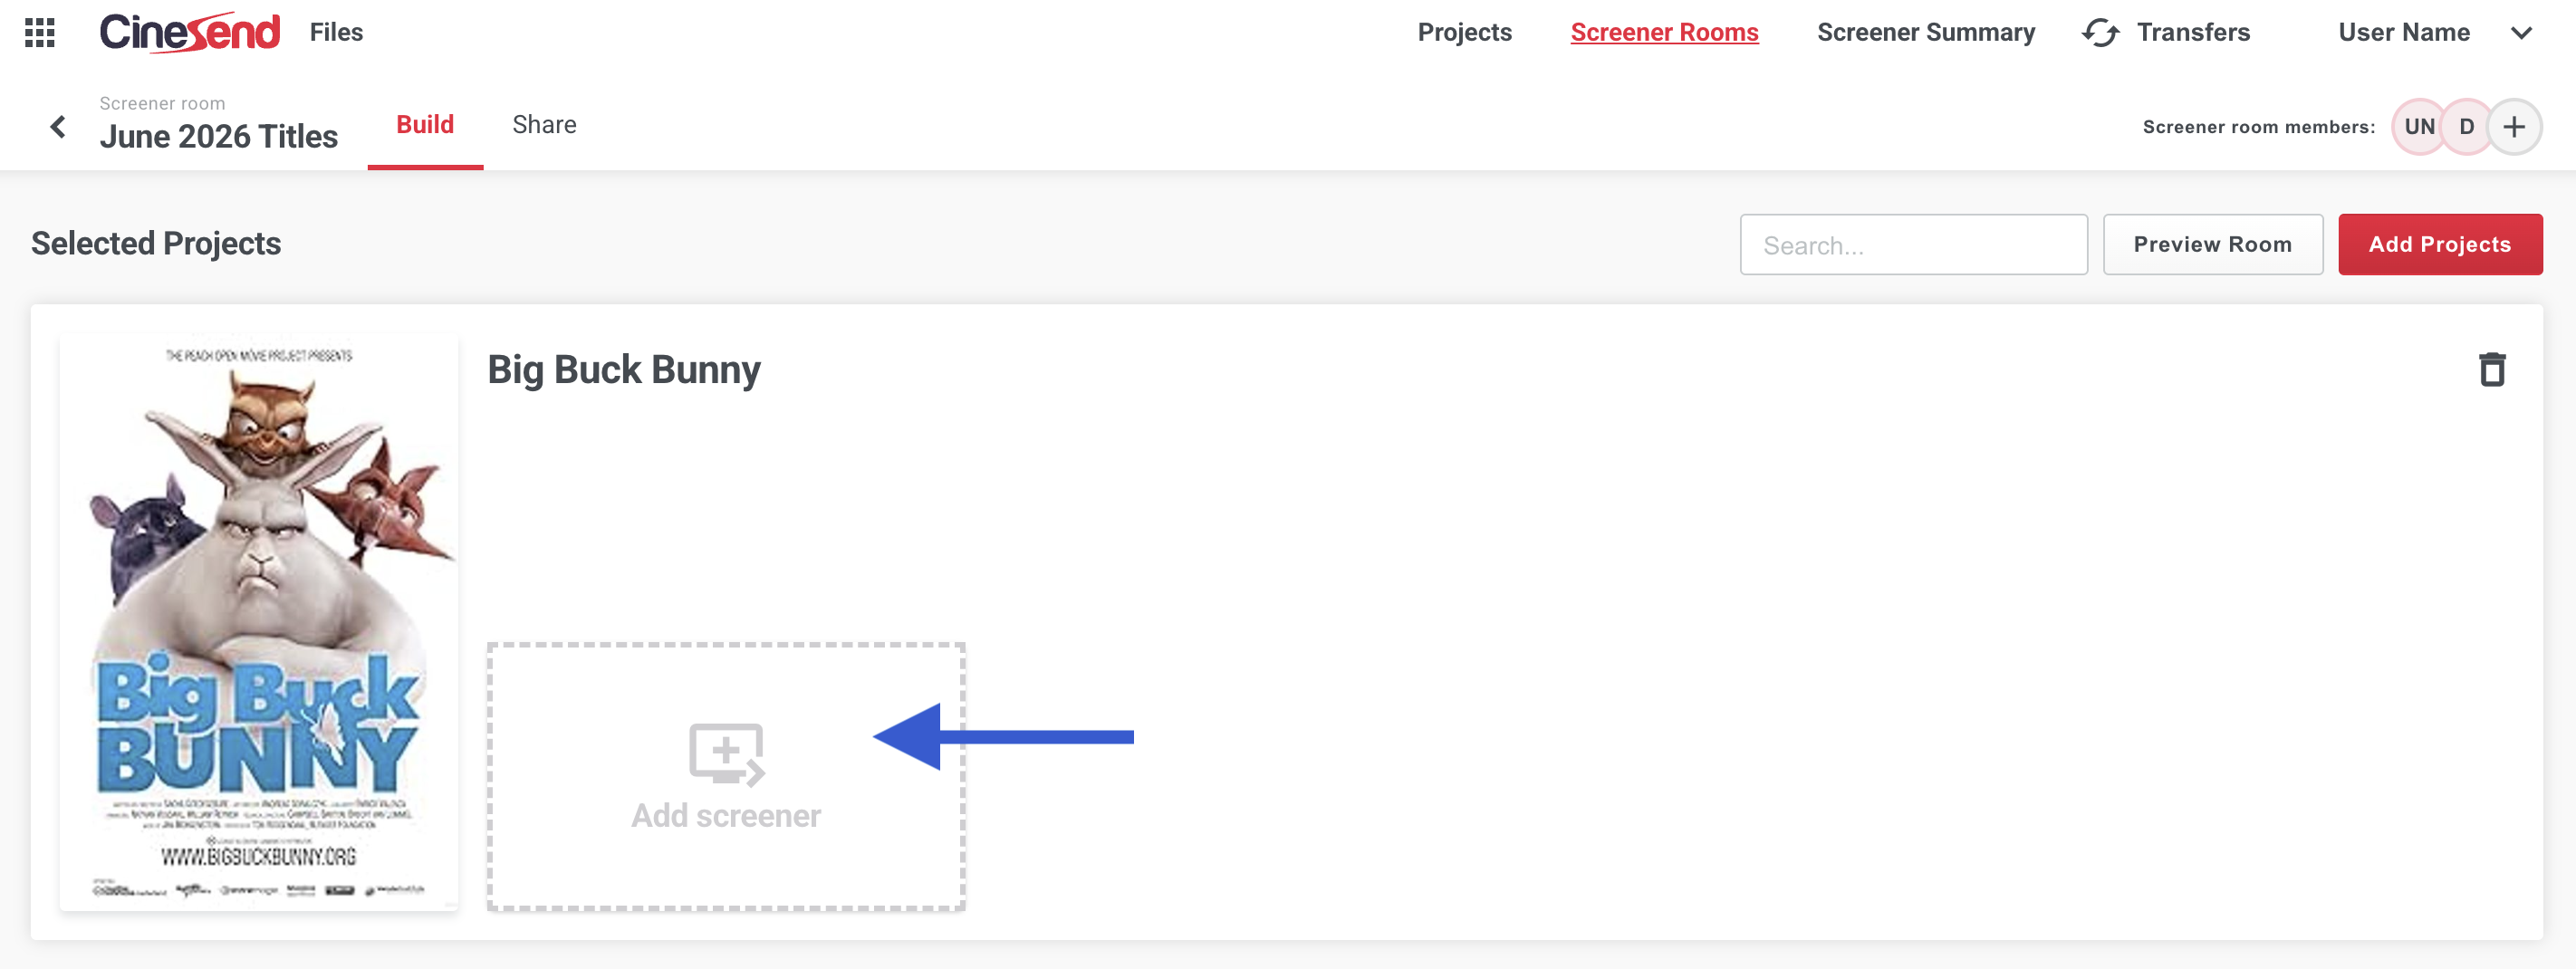
5. Creating and sharing a Screener Room
If you would like to share several titles together, you have the option to create a Screener Room with all of the titles together in one place.
- Navigate to the Screener Rooms tab
- click the red "Create Screener Room" button
- give the Screener Room a name
- click the red "Add Projects" button
-
for the selected projects, click Add Screener for each

Once all of your screeners have been added, use the "Preview Room" button to open a new tab and see how the page looks. When you are ready to share the room, click the "Share" link at top, and then the red "Share Screener Room" button. You can either share an email to their email address, or create a sharing URL that can be copied and sent out.

Enjoy using your new CineSend Files account!